

Reading an Open-Source ESP32 Schematic Before Reusing It
An ESP32 TouchDown case study for reviewing an open-source schematic before reuse, covering power, reset, boot, USB, connectors, and tests.
Share
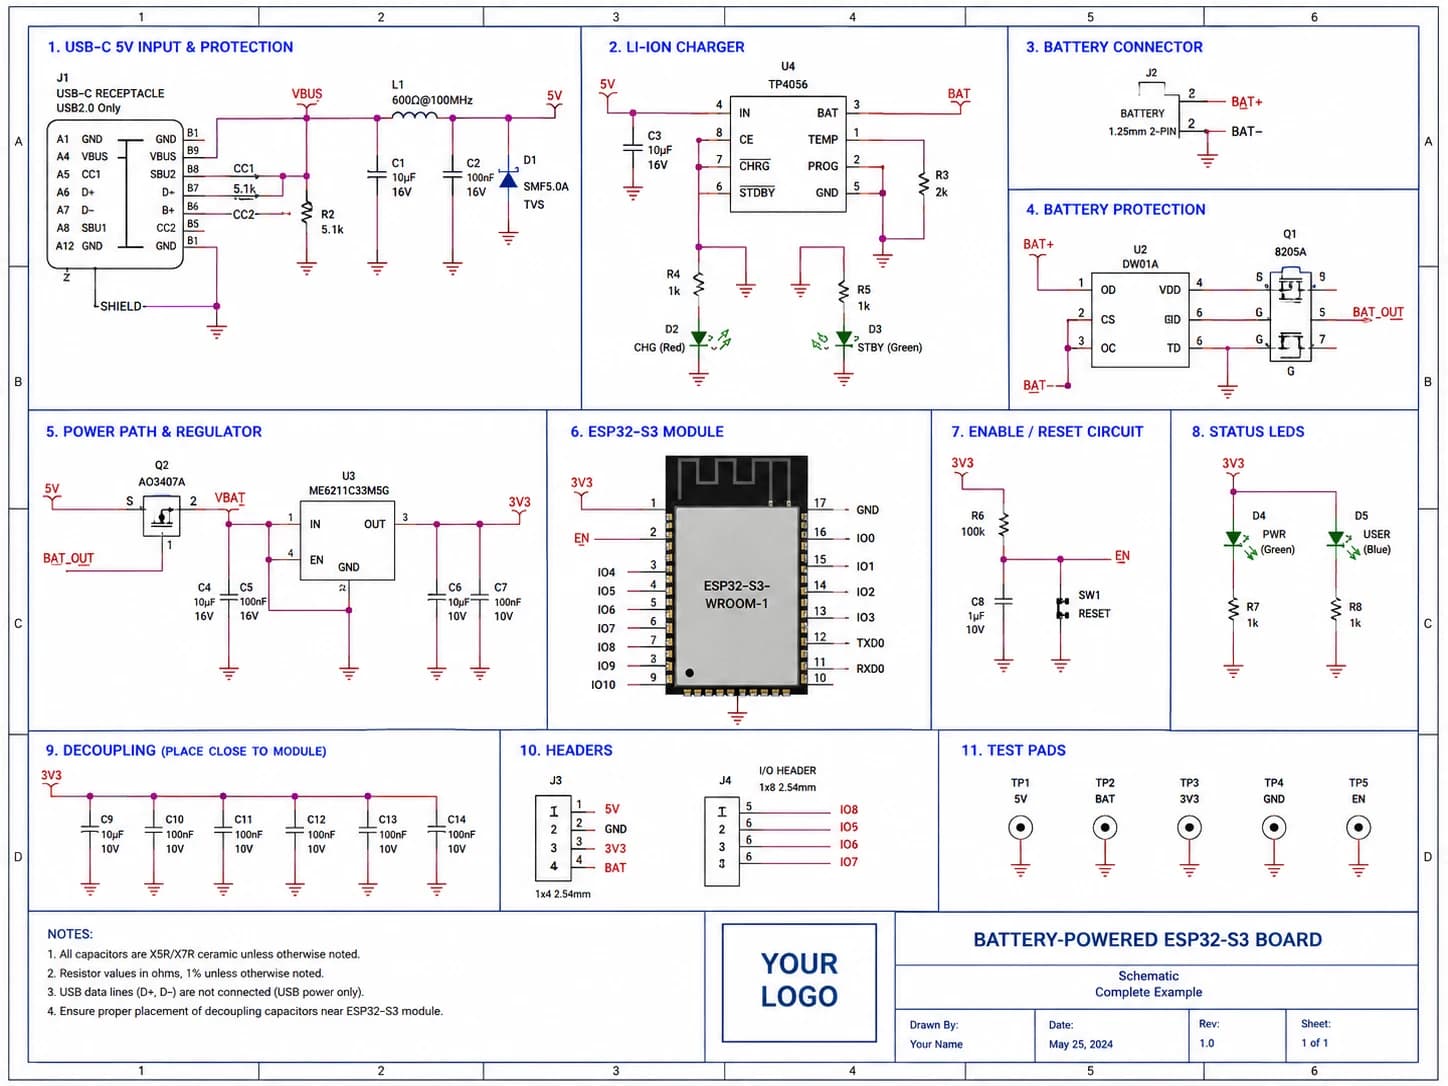
I will walk you through the review in the same order I use at the bench: power first, then boot, interfaces, protection, and test access.
A good open-source schematic can save a lot of time. But “open-source” does not mean “copy it into the next product unchanged.” Before reusing a design, you need to understand the original intent, the constraints of the source board, and which parts need to be verified again.
This article uses ESP32 TouchDown on Nastrotek as a case study. It is an ESP32 PCB with a TFT touchscreen, USB-C, USB-to-UART, battery management, microSD, buzzer, and GPIO breakout. The goal is not to judge the original design. The goal is to build a repeatable way to read a schematic before adapting it.
Start with a Block Map
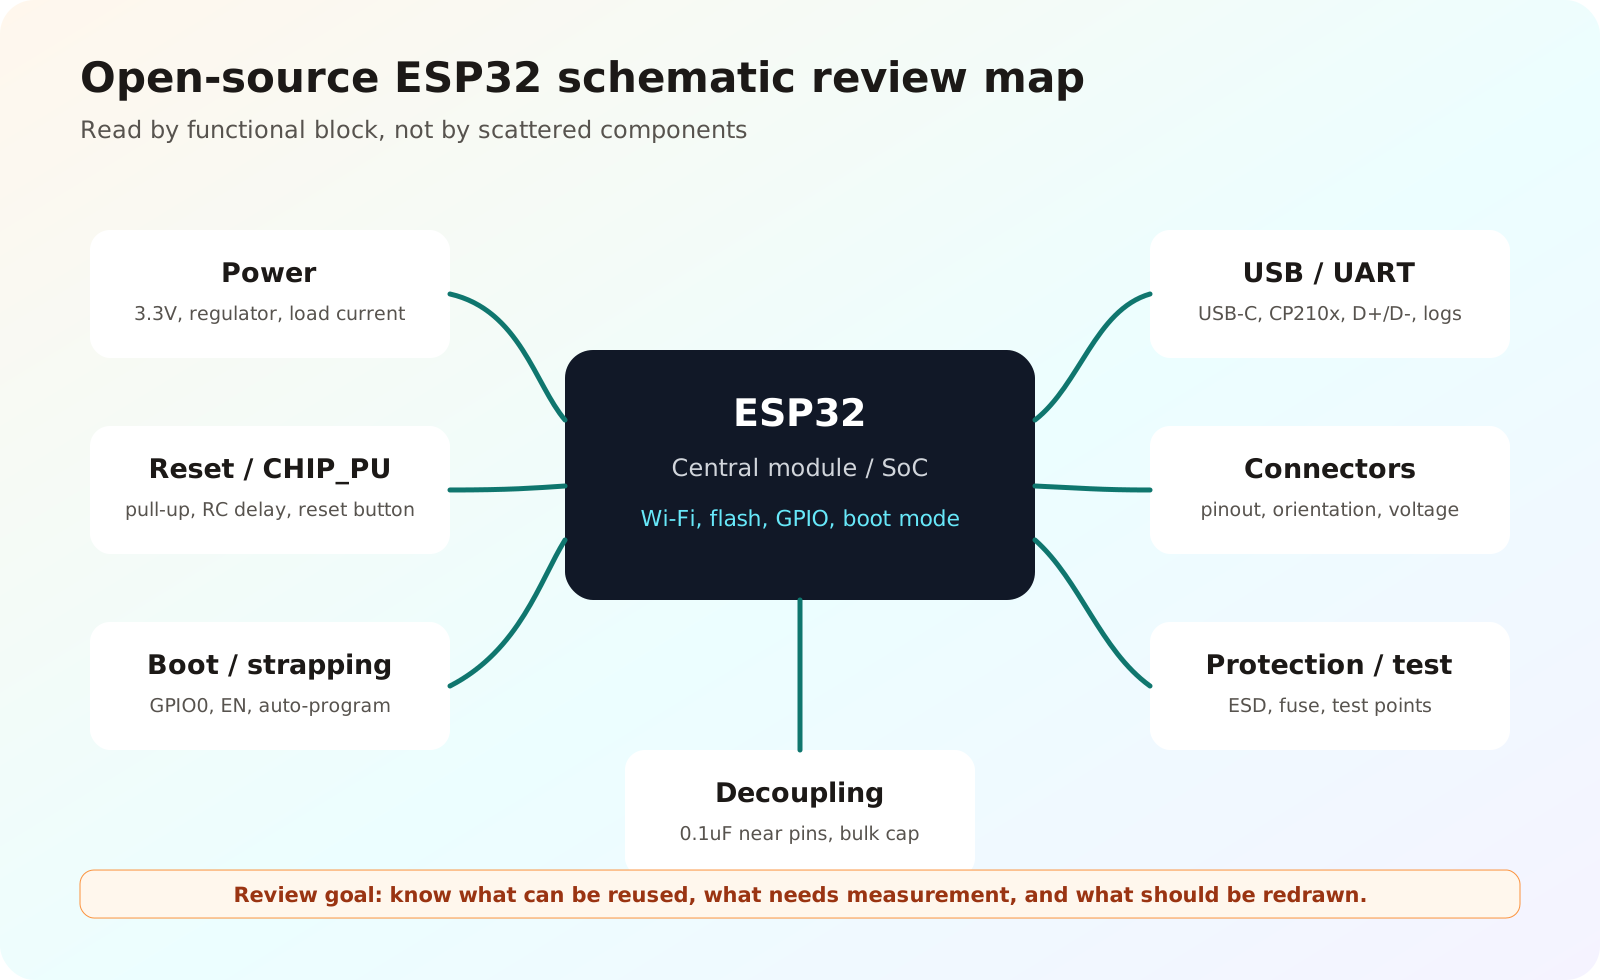
Reading by functional block reveals risk faster than inspecting isolated components one by one.
When you open an ESP32 schematic, do not read it like a page of text from left to right. Split it into functional blocks:
- Power.
- Reset and
CHIP_PU. - Boot and strapping pins.
- USB or USB-to-UART.
- Decoupling around ESP32.
- Connectors for display, touch, SD card, or GPIO.
- Protection and test points.
Espressif organizes its schematic checklist in a similar way, covering power supply, reset timing, flash/PSRAM, clock, RF, UART, SPI, strapping pins, GPIO, and related areas. This block-first view makes review much faster than inspecting isolated resistors one by one.
Case Study: ESP32 TouchDown
ESP32 TouchDown is a useful example because it is more than a minimal dev board. The upstream repository lists ESP32-WROOM-32D, an ILI9488 480x320 SPI display, FT62x6 I2C touch controller, 3.3 V regulator, battery management IC, CP2102 USB-to-UART bridge, USB-C connector, microSD holder, buzzer, battery voltage divider, and GPIO breakout.
That mix of blocks makes it a good schematic-reading exercise:
- The display uses SPI plus control pins such as CS, reset, and data/command.
- Touch uses I2C and has an IRQ pin.
- microSD shares some SPI-related signals.
- USB-C goes through USB-to-UART for firmware upload and logs.
- Battery and charging should be read as a power subsystem, not just “adding a battery.”
Before reusing the idea, ask whether the new project uses the same display, needs a battery, wants USB-UART or native USB, needs microSD, and can keep the same connector orientation inside the enclosure.
Check Power First
For ESP32, 3.3 V power is not a small detail. Espressif recommends enough supply current, ESD protection and bulk capacitance at the main power entrance, plus suitable decoupling near the ESP32 power rails.
When reading an open-source schematic, check:
- Whether the regulator can handle peak current when Wi-Fi, display, and backlight are active.
- Whether there is bulk capacitance near the input and near heavy loads.
- Whether battery charging and power switching are safe for the target use.
- Whether the battery measurement divider leaks too much current.
- Where the display, SD card, buzzer, or backlight get their power.
If the source board runs well with its original display and battery, that does not automatically mean it is enough for a new project with a different screen, louder speaker, or higher peak load.
Reset, Boot, and Firmware Upload
ESP32 needs correct reset and boot behavior to run reliably. In Espressif's checklist, CHIP_PU should not be left floating; it needs a pull-up and often an RC delay so the power rail can stabilize before the chip starts.
In the schematic, look for:
- Where
CHIP_PUorENgoes. - Whether there is a reset button.
- Whether boot/strapping GPIOs have intentional pull-up or pull-down resistors.
- Whether auto-programming through USB-UART controls
ENand the boot pin. - Whether a connector or external module can pull a boot pin into the wrong state at startup.
This class of issue is frustrating. A board may work on USB at the bench, then boot incorrectly when a module is attached, the battery is weak, or the supply rises slowly.
USB, Connectors, and Protection
USB-C and connectors look simple in a schematic, but they strongly affect real use. On a board like ESP32 TouchDown, USB is used for firmware upload, power, and debug logs. If you copy that idea into another design, recheck:
- Whether USB power goes through suitable protection, fuse, or power-path handling.
- Whether USB data lines have routing and protection appropriate for the design.
- Whether connector pin names are clear.
- Whether the footprint orientation could be mirrored by mistake.
- Whether breakout connectors clearly communicate logic voltage and ground.
For a small product, test points are just as important as connectors. At minimum, reserve places to probe 3.3 V, GND, reset/EN, UART or USB debug, and a few major buses.
Decoupling and Parts Near the Chip
Decoupling is easy to under-copy because it looks boring. But for ESP32, capacitors near power pins help keep rails stable when the radio, CPU, and peripherals change load quickly.
Look for 0.1 uF capacitors near important power pins, larger capacitors on the main rail, and any special parts around flash/PSRAM, crystal, or RF when the design uses a bare SoC. If the design uses an ESP32-WROOM module, much of RF and flash is inside the module, but external power, reset, boot, and IO still matter.
When to Reuse and When to Redraw
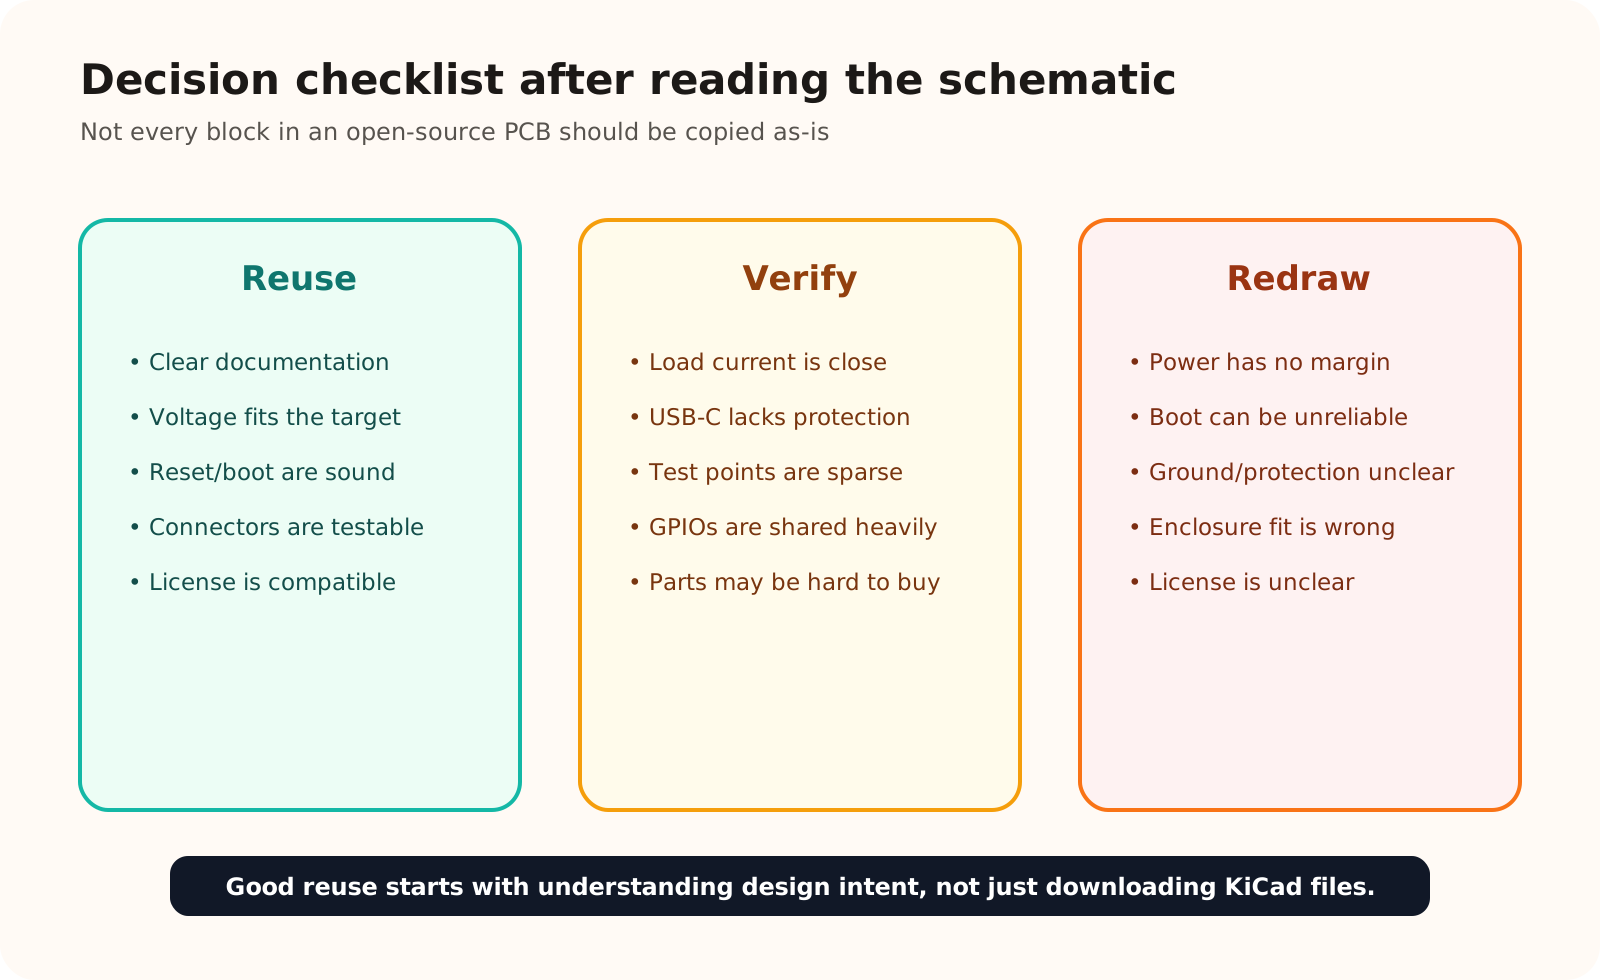
Not every block should be copied as-is. Some blocks need measurement or a redraw for the new product.
A practical approach is to classify each block into three groups:
- Reuse: documentation is clear, parts are available, voltage fits, license is compatible, and the block matches the new project.
- Verify: load current is close to the limit, GPIOs are heavily shared, the connector must fit a different enclosure, protection is unclear, or test points are sparse.
- Redraw: power has no margin, boot may be unreliable, USB/protection does not fit the requirement, license is unclear, or the footprint does not match the new manufacturing process.
For ESP32 TouchDown, the display and touch section can be useful for understanding an ILI9488 + FT62x6 pinout. But if the new project uses ESP32-S3, native USB, a different display, or a different battery path, do not copy the power, USB, and boot blocks without reviewing them again.
A Short Reuse Checklist
Before bringing an open-source schematic into your project, answer:
- Which ESP32 chip or module does the source board use, and does it match the new design?
- Does the 3.3 V rail have enough current and capacitance for the new load?
- Do reset, boot, and firmware upload match your development flow?
- Is USB-C or USB-UART the right choice for the new product?
- Are connector pinouts, voltage levels, and orientation clear?
- Is there protection for power, USB, and external connectors?
- Are there enough test points for first-board bring-up?
- Does the license and credit model allow your intended reuse?
If an answer is vague, mark that block as “verify,” not “done.”
Conclusion
Reusing an open-source ESP32 schematic is a strong way to learn and move faster, as long as you read it as an engineering design rather than an unconditional template. Using ESP32 TouchDown as a case study highlights the blocks to inspect first: power, reset, boot, USB, decoupling, connectors, protection, and test points. Once you understand why each block exists, copying turns into controlled redesign.
References
Share
Keep exploring
Read next
Related articles
Net Classes and Trace Width: When Should a PCB Trace Be Wider?
A practical guide to PCB net classes and trace width for small boards: signal traces, 3V3, 5V, battery paths, ground, power vias, and a pre-Gerber checklist.
PCB Ground Planes: GND Is More Than a Net Name
A practical guide to PCB ground planes, return current, GND layout mistakes, stitching vias, decoupling paths, and copper pour checks.
Choosing Capacitors for Electronics: Simple Part, Easy Mistake
A beginner guide to choosing capacitors for circuits: capacitance, voltage rating, decoupling, ceramic types, DC bias, and ESP32 values.